How to Clean Your Keyboard


With scientists discovering that keyboards carry up to 5 times as much bacteria as a public toilet seat, and the likelihood of you reading this article with a keyboard within a fingers length away from you, we think it’s safe to say going out of your way to figure out how to clean your keyboard is something well worth your time.

Sure, it may be visually unappealing, but it also must be taken into account that desktop hygiene is in fact a thing that should be constantly noted – especially in this day and age when nearly everyone comes in contact with a computer and a keyboard on a daily basis. But exactly what bacteria is flourishing in the crevices of your keys? From E.Coli to Staphylococcus aureus (a nasty bug that creates toxins that lead to food poisoning) it should be known that this bacteria is, well, bad. Never fear, Meritline has your back – read on to find out a few methods to make sure your keyboard is squeaky clean and grime free.

Reminder: Before you utilize any of these methods, ensure that your computer and or keyboard is powered off or unplugged.


Step 1

For a quick way to remove any surface debris that is clogging up your keyboard, turn your keyboard upside down and grab a can of compressed air and spray away and large bits. Take care to do this on a desk or any other hard flat surface where you can easily clean up the mess afterwards. After a thorough spray, tap the keyboard against a flat surface (we suggest a notebook placed on a desk to absorb the shock and be a bit more gentle on your keyboard). After tapping, you should see additional debris fall out. If you feel like there is still large bits of grime inside, repeat these steps.


Step 2

Now that you have all of the large debris out of the way, it’s time to get into the nitty gritty. Grab a handful of q-tips and dip them in ispropyl alcohol and go to town with cleaning
the crevices of your keys. While cleaning the sides of them, note when the q-tips starts coming up clean – that is when you’re done with step 2.

Step 3 (Optional)

If you really want to ensure that your keyboard is completely grime and bacteria free, this step is essential. However, if your primary concern is your keyboard only looking aesthetically pleasing, you may skip this final step. Being the most labor intensive, you will have to remove every key on your keyboard, if possible.
Do research on your keyboard brand and look up how to remove the keys in order to do this safely without breaking your keyboard, a generic technique is to use a screwdriver or something similar to gently pry them up. Once all keys are removed, take a wet rag that has been thoroughly squeezed out  and wipe the keyboard surface lightly. take each individual key and wipe them down to ensure they are completely clean and replace them onto your keyboard.


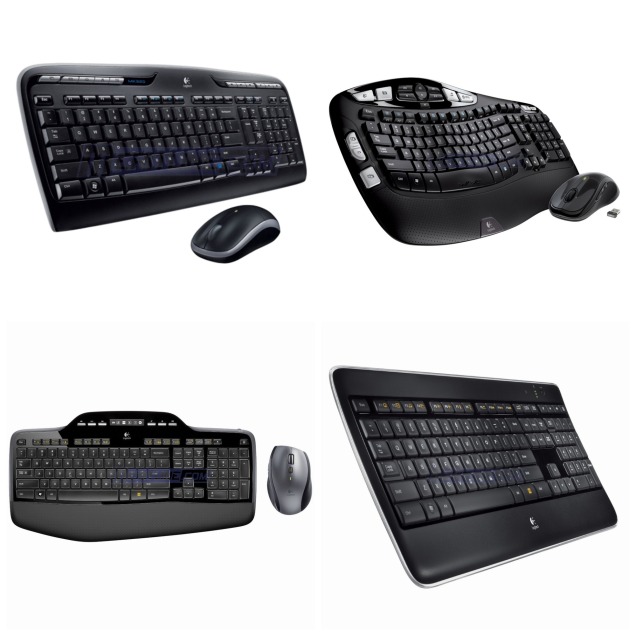
If you just don’t want to confront the grime or feel like your in way too deep with your keyboard and it is past the point of return when it comes to cleanliness, start fresh with one of our keyboards and keep it clean with our methods you just read:


Click Here to Shop Meritline Keyboards and Start Fresh!meritcollage

How To Rip Burn And Copy A CD In Just A Few Steps

cd-699786_640

Do you have a significant number of CDs at your home where you have some of your favorite songs, perhaps mixes that you have done over the years, and you would either like to create backup copies, or share them with friends and family? This is a common desire that many people have, but they lack the expertise on how to get this done. It’s a different process when you are simply burning songs to a CD, yet you are probably going to use a very similar program when it comes to ripping one and burning it to a new CD, a brand-new copy that you can give to people that you know. Here are the steps that you need to take in order to a college this in no time at all.

shopnow_button

Identify Your Music Tracks

The first step of the process is taking your CD that has the songs on it that you would like to burn or copy, placing it into your CD player. This will work with any computer, whether you have a laptop, desktop, or an all-in-one PC. You will want to use Windows media player if you have a PC, or a similar program that may be on your computer. If you have a Macintosh, there are programs that you can use, following similar steps, that will accomplish the same goal. This can also be done if you have either transferred the songs that you want to burn onto your desktop, but for the purpose of this article, we are going to only discuss taking songs from one CD and putting them on a new one.

Loading The Software

if you place the CD into your computer, there is the possibility that it may actually load the software that will be used for this transfer process. If not, assuming you have a PC, load Windows media player. You will want to select the “burn” or “rip” CD option to get started, and then it will ask you to choose the songs that you want to transfer. You can also assemble a mix, compiling a completely different order to the playlist if you like, but the easiest ways to simply use what is there making a straight copy. If you cannot find the CD, it’s usually in what is called “E” drive, or something similar, separate from “C” drive which is your hard drive. “F” drive is going to be your backup, so simply select the one that indicates it is your CD player, identified by an icon that has a shiny CD on it. Once you click the button to copy the CD, it will transfer the files into memory, and take you to the next step.

Philips CD-RW 4X-12X Silver Branded Rewritable CDRW Blank Media Discs (CDRW8012/550) 80Min/700MB in 25 Pack Cake Box
Philips CD-RW 4X-12X Silver (CDRW8012/550)

Insert A Blank CD

Once the process is complete, the door to your CD player will open. At that point, you will be prompted to remove the existing CD that has your songs, and place in a brand-new one. This one should never have been used before. If you have ever tried to burn anything to this CD, it will likely not work. They do not cost very much, so selecting a new one out of your pack of blank CDs, you will be able to insert that into the CD player, pushed the door closed, and it will begin the next part of the process. Just make sure that you have a blank CD that has at least 700 MB of space to accommodate all of the songs that you are going to burn onto it. More than likely, if all of the songs fit on the other CD, they will also fit on this one. This gives you about 80 minutes of song time which is usually more than enough.

Click The Burn Button

When you copied the songs onto the hard drive by ripping them off of the existing CD, they were stored in memory. Now with the blank CD in the CD player, you will want to click the “Burn” button. It will analyze the blank CD, making sure that it can transfer the songs. It will sometimes allow you to organize the playlist that you are going to burn before the actual process begins. Once you are satisfied with the order of the songs if that is an option, by clicking “Burn” it will start to put all of the songs in memory on to the new CD. There is usually a countdown of how long it will take to complete the process. Once complete, which will take just a few minutes, it will tell you that the process was either successful, or if it failed. The door to the CD player will open, and you can take out your brand-new copy of your songs, ready to give to whomever you want to, and exact copy of your music CD.

shopnow_button

How To Make Your Windows PC Computer Run Faster

workstation-405768_640

With time, your computer will start to run slow and it will take a lot of time opening a program. If your computer is getting slow and bogging down, read on and learn all the tips you can apply and make it run faster again.

shopnow_button

1. Keep Free Space at Maximum

It is a rule that you should keep your hard disk 15% free for your computer to run smoothly. You can know the space in your drive by going to “My computer” you will then right click on the drive and choose “Properties.” You will get a pie chart that will give you all the details you will need about the drive. If your drive is full, you will start by deleting all your unnecessary programs and data. If there is enough space, then the problem is somewhere else.

2. Uninstall Unused or Unnecessary Programs

There is an option in control panel where you will be able to remove or uninstall all the programs that you are not using. You should check the specific procedure depending on your operating system. You will get a master list of all the programs that are installed in your PC. There are program you will just notice that they are not of use and you should uninstall them immediately. There are some programs that will not be familiar and you will need to do some research to know if they are important or not.

When you are in the control panel, you should check how often you use a program before you uninstall it. This is an additional feature that will help you decide on which programs you should get rid of. You will get programs you have not used for years or months and they should be potential candidates for deletion. You should not remove a program you are not sure of – you may end up damaging your computer.

3. Start With The Least Amount of Programs

Configure your computer to start with only the necessary program. The more programs that start with the computer the slower it becomes and it will take a long time for it to boot. There are configurations options at MS Config that will allow you to select the programs that you want to initialize with your computer.

4. Set Power Option To High Performance

If you are running a desktop PC, you should change power options to high performance and the hardware will not be limited by manufactures settings.

5. Minimize Background Processes

Background processes will also slow down your computer. It is advisable to disable all programs that are running in the background. In doing this, you will free up valuable CPU cycles and RAM space. Be very careful not disable the programs you are using.

5. Clean Windows Context Menu

Remove any entries from Windows Context menu that are unnecessary. You will not that there are programs that will want to sit on the context menu and they are not in use. You should disable all of them and you will note your computer performance will improve.

6. Get an Anti Virus Program

It is very helpful to have an anti-virus program in your computer. The lesser viruses and bugs your computer will have to deal with, the more space and time it will have to deal with other processes. With that said, you will also have to keep your windows up to date. This is a tip that will ensure your windows run smoothly and you will enjoy the updates that come with a new windows update. An anti-virus program will slow your computer but not as slow as a virus would.

7. Run Disk Cleanup Often

It is also helpful to run a disk cleanup of your hard drives. You will be able to delete a lot of temporary files that could be eating your valuable disk space. You will be able to find them and have an option of whether to delete them or keep them. After running a disk cleanup, you should select all the files except setup and game files.

8. Use Solid State Drive (SSD)

You can replace your hard drives with Solid State Drives (SSD). They are secure and faster than hard disks.

9. Defrag Your Hard Drives

A Disk Defragmentation is also helpful in reconfiguring how the computer stores data and in the process improving its efficiency.

10. Check Your Computer For Errors

Do not wait till your disk tells you there is an error. Always check for any kind of disk errors that can slow down the performance of your PC. If you get trouble starting it, you should schedule the Check and it will run on the next boot.

shopnow_button